How to simulate an organization with your existing PayPal account, or add a second email
We find that many customers are collecting money for personal - and organizational causes. While we love this idea, it makes it hard for payers to want to give money to a humane society when a personal name shows up on the bill. (Wait, this isn't who I was giving to!) This quick tutorial will show you how to simulate multiple accounts with one Pay It Square Account.
For our example, I will be using the email address autorallygr at gmail dot com, because I planned an Auto Rally and used Pay It Sqauare to register drivers. The email address also helped me keep all of the payments separated from personal payments.
We recommend this option for a few of our more experienced users.
Here is the Overview:
1. Create a new E-mail address or use an existing one.
2. Add that E-mail address to PayPal & Pay It Square.
3. Switch Pay It Square to that new address.
4. Change the name of the organizer on the top of the page.
Here is that procedure in some detail:
1. Create a new E-mail address or use an existing one.
This part of the process involves some creativity. Think about why you are collecting money, and what payers will want to see when donating. If you are collecting money on behalf of an organization, get an email like collections@yourorganization.com or helpmyson@gmail.com. This shows your donors you put effort and work into your page, and the cause behind it. Keep that Email address handy- we'll be needing it again and again.
2. Add that email to PayPal....
Now its time to add and verify that email address with PayPal. Go ahead and login to PayPal with your regular email and follow these steps.
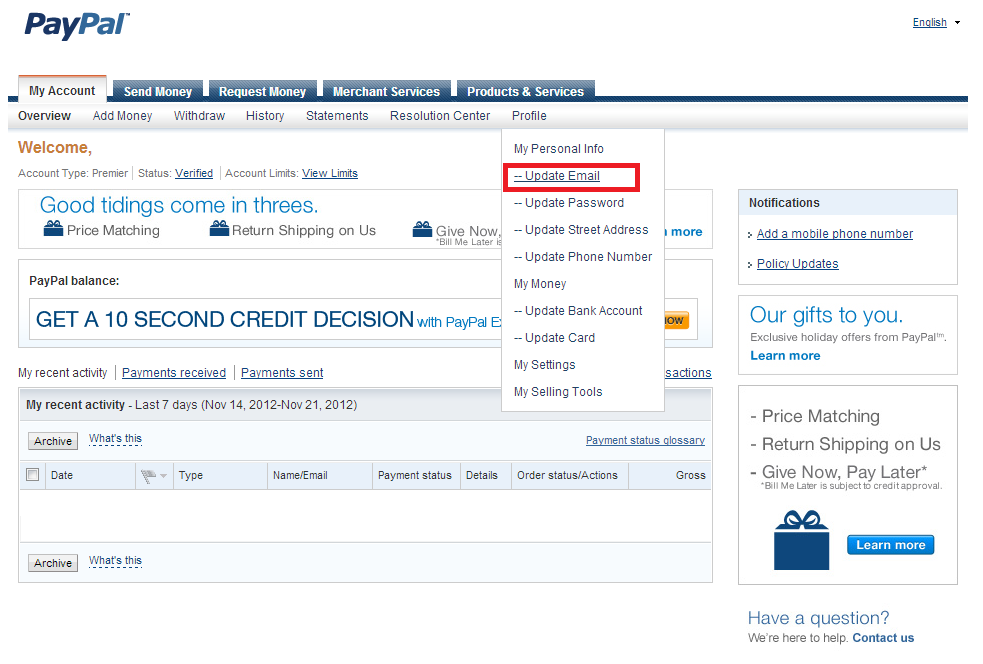
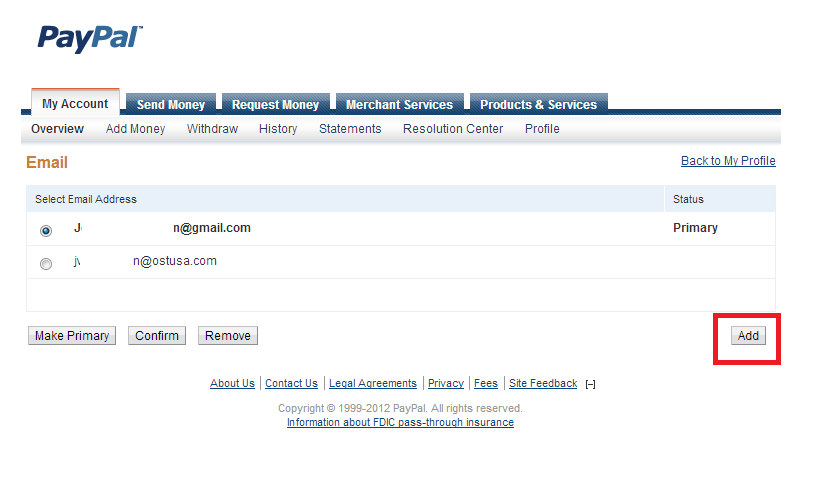
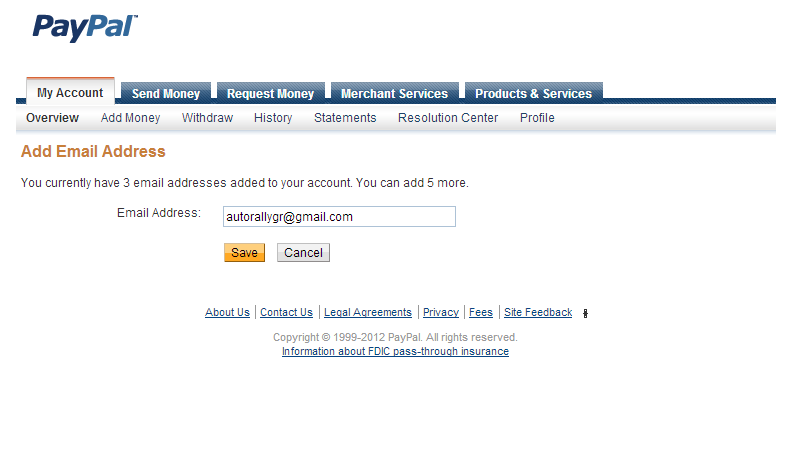
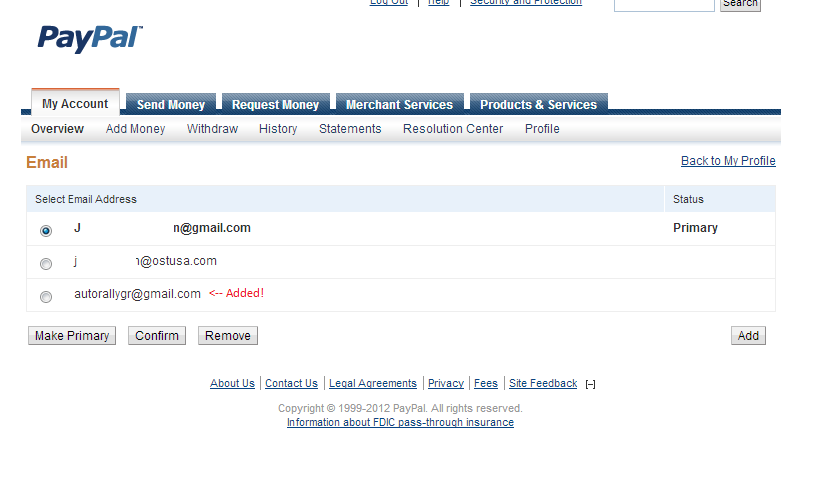
Great, now that the new email is added to the account, you can log out of Paypal. You will not need to make that new account primary, just leave it. (Please don't forget to confirm that email address with PayPal!)
3. ... and Pay it Square
Go ahead and log in to Pay it Square, and set up a new page. Look for "Advanced Settings" in the grey box, click to open the menu. Scroll down until you see this:

As seen above, enter in the new email address. If you have already verified the new email address with PayPal, then click the button "Check This Email's PayPal Account Status" and wait for it to check out. Click Save and Done.
4. Change the name of the organizer on the top of the page.
Now, Click up top on "My Account --> Profile" and enter in a corresponding name for the Organizer field. It should look like this:
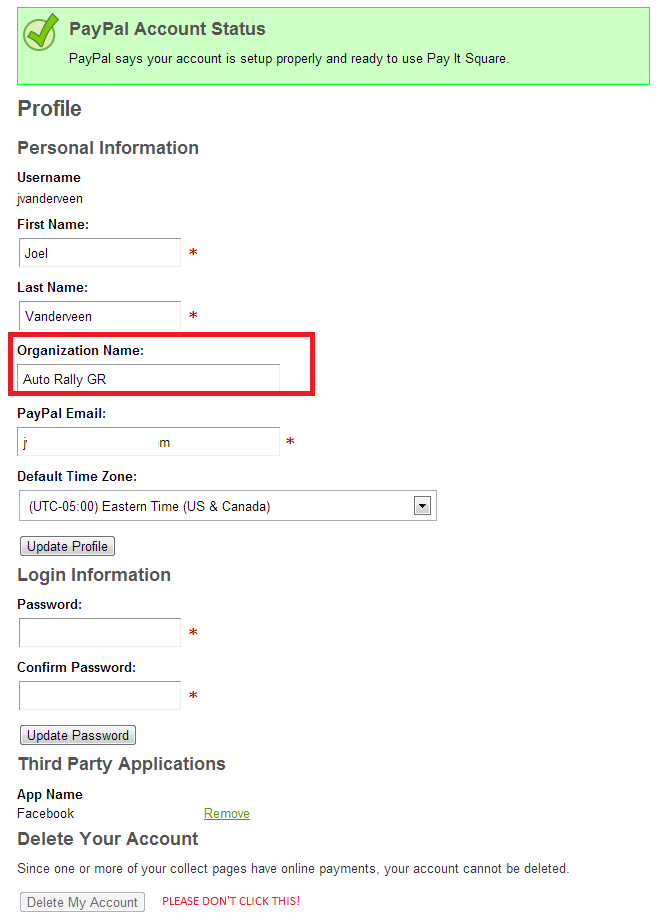
Cool. Now hit save.